
DIY Bumblebee Door Hanger!
How to Make a DIY Bumblebee Door Hanger: Step-by-Step Guide
Are you ready to add a touch of whimsy and charm to your home decor? Join Jere from Amber Marie and Co. as she guides you through the process of creating a delightful bumblebee door hanger. In this step-by-step guide, you'll learn how to craft your very own bee-inspired masterpiece.
Materials You'll Need:
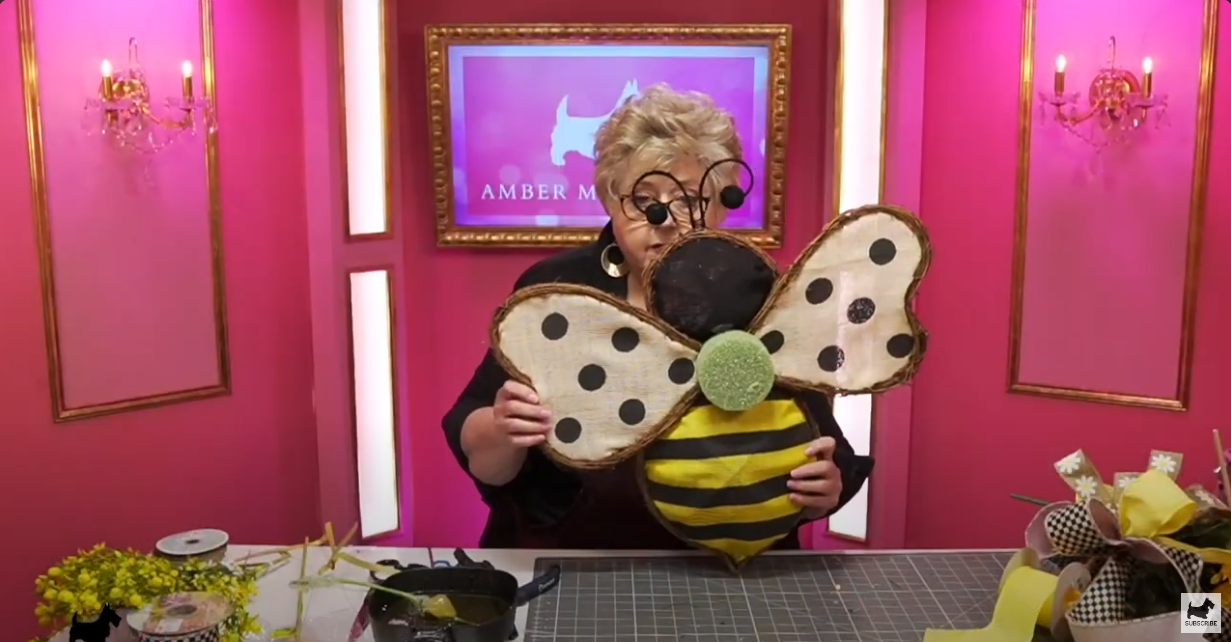
- Twig Burlap Bee
- Assorted ribbons (in yellow, black, and complementary colors)
- Bumblebee embellishment
- Floral wire
- Zip ties
- Styrofoam circle
- Assorted silk flowers
- Greenery
- Hot glue gun and glue sticks
- Scissors
Optional but will make your door hanger more awesome:
- Bumble Bee/ Daisy On Royal Ribbon
- Bumblebee Block Pattern Ribbon
- Hive Bee Spray
- Bee Spray
- Brynlee Bee
- Queen Beesy Display

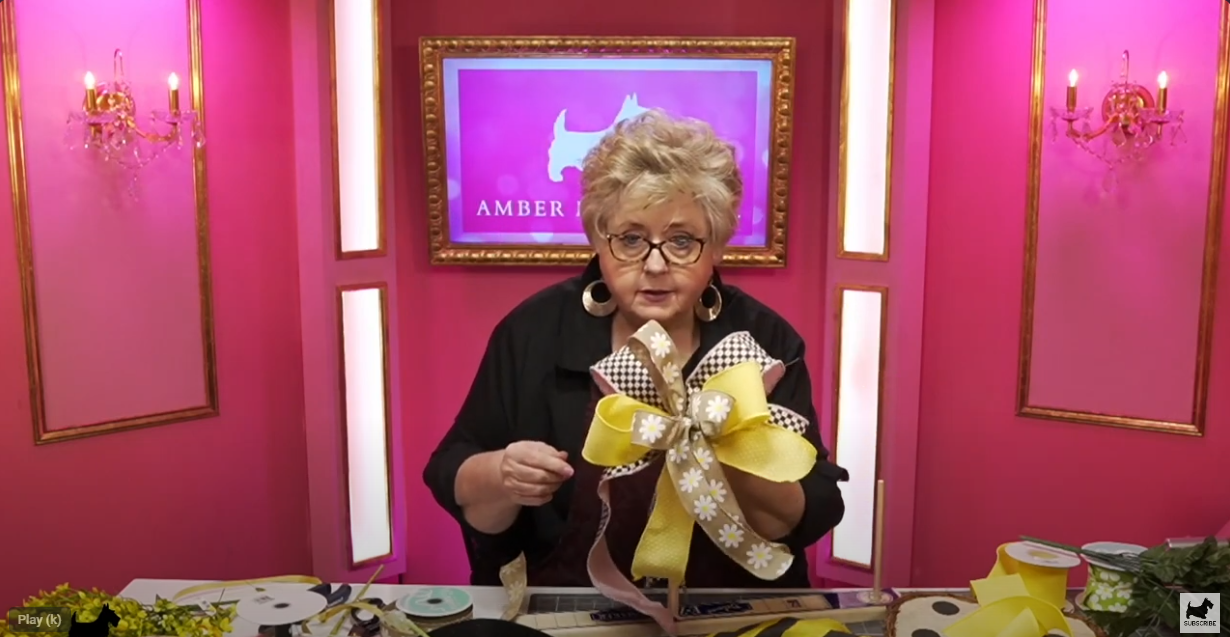
Step 1: Making the Bow
Begin by selecting your ribbons. Choose a combination of colors and patterns that complement each other and your bumblebee embellishment. Cut a length of ribbon for the tail, approximately 8 to 12 inches long.
Using an easy bow maker tool, create loops with your ribbons to form the bow. Start with larger loops and layer them to achieve a fuller look. Secure the loops with a zip tie and trim any excess ribbon.
Step 2: Attaching the Wire
Insert a piece of floral wire through the back of your bow to provide stability and a means for hanging. Use hot glue to secure the wire in place, ensuring it's firmly attached to the bow.
Trim any excess zip tie and fluff out the loops of your bow to create a fuller, more voluminous look.
Step 3: Adding Flowers and Greenery
Now it's time to embellish your bumblebee door hanger with silk flowers and greenery. Start by attaching the largest flowers to the styrofoam circle using hot glue. Arrange them in a visually pleasing manner, keeping in mind the placement of your bumblebee embellishment.
Continue adding smaller flowers and greenery around the larger blooms, filling in any gaps and creating a lush, garden-inspired look. Vary the colors and textures for added visual interest.
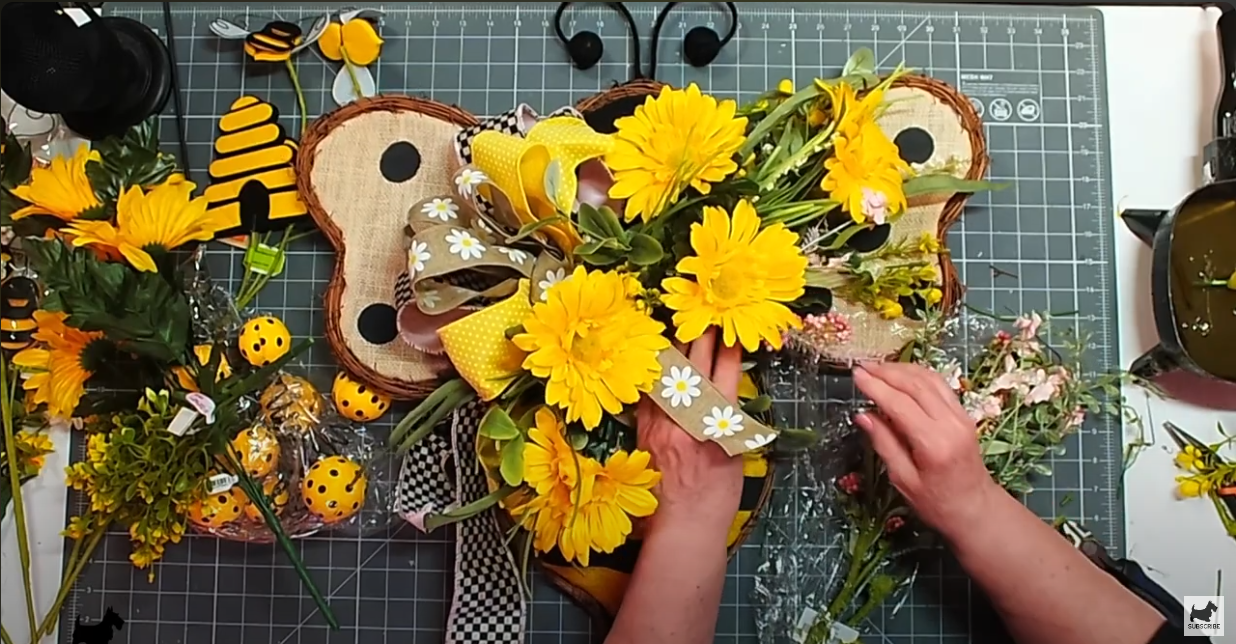
Step 4: Incorporating Baby Bees and Additional Details
To complete the look, add small bee embellishments to your door hanger. Cut the bee stems as needed and place them strategically among the flowers and greenery, creating the illusion of a buzzing bee garden.
Consider adding additional details such as moss or decorative accents to further enhance the whimsical charm of your bumblebee door hanger.
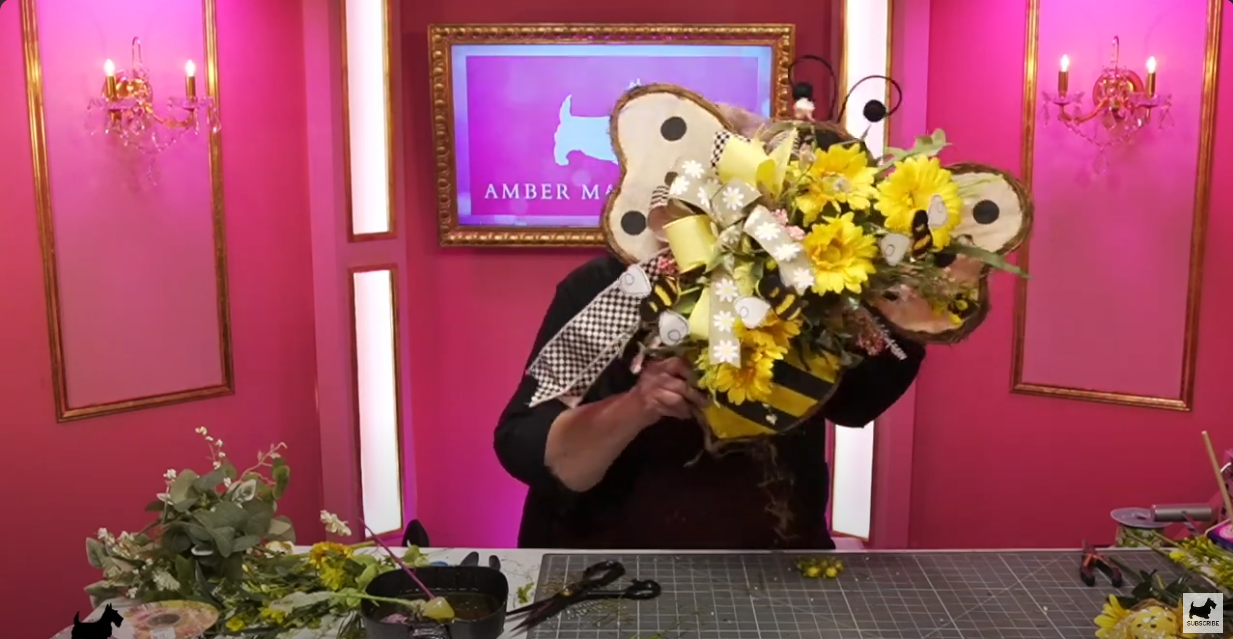
Step 5: Final Touches and Hanging
Once you're satisfied with the arrangement, trim any stray ribbons and ensure all elements are securely attached. Take a moment to admire your handiwork and make any final adjustments as needed.
Finally, hang your bumblebee door hanger on your front door, back door, or any other space in need of a touch of cheer. Step back and enjoy the sight of your delightful creation greeting visitors with its charming presence.
Conclusion:
Creating a DIY bumblebee door hanger is a fun and creative project that will add personality to your home. With guidance from Jere at Amber Marie and Co., you can easily craft a whimsical masterpiece that will brighten any space. So gather your materials and let your creativity soar! For a visual guide and more detailed instructions, be sure to watch the full tutorial on Amber Marie and Co.'s YouTube channel. Don't forget to subscribe for more inspiring DIY projects and creative ideas!


